Description
Calibrate Instrument is used to measure and correct for drifts in potentiostat circuitry. Gamry Instruments’ potentiostats are precision instruments not subject to large drifts. However, occasional recalibration by a user can improve instrument accuracy.
All User calibrations can be performed at a user’s facility. Additional information including instructions for calibrating specific instruments can be found on Gamry's website at: https://www.gamry.com/support/documentation-downloads/
|
Gamry Instruments’ potentiostats make extensive use of software calibration. Some of the calibration data is recorded at the factory. These Factory Cal data cannot be measured and replaced at a user’s facility. Other calibration data are called User Cal data. These are the data that are measured and replaced during the calibration routines described here. Gamry Instruments has a System Assurance program that allows you to update your Factory Calibration data. Contact your local Gamry representative for more information. |

Potentiostat recalibration is only required infrequently. Gamry recommends calibrating the instrument at least once per year, or when the quality of your data is in question.Recalibrate your potentiostat under the following circumstances:
•It has been at least one year since your last calibration.
•After your potentiostat has been serviced.
•After your firmware has been updated.
•If you notice breaks or discontinuities in the data-curves recorded with your system.
•If the system is being run in an environment that is very different from the previous operating environment. For example, if the potentiostat was calibrated at 18°C and you are now operating it at 30°C, you should recalibrate.
•When you change to different cell cables.
|
In rare cases, user calibration may be lost after a firmware update. Therefore, Gamry recommends to recalibrate your potentiostat after a firmware update. |
Calibration data are stored within the instrument. You do not need to recalibrate when a potentiostat is moved from one computer to another.
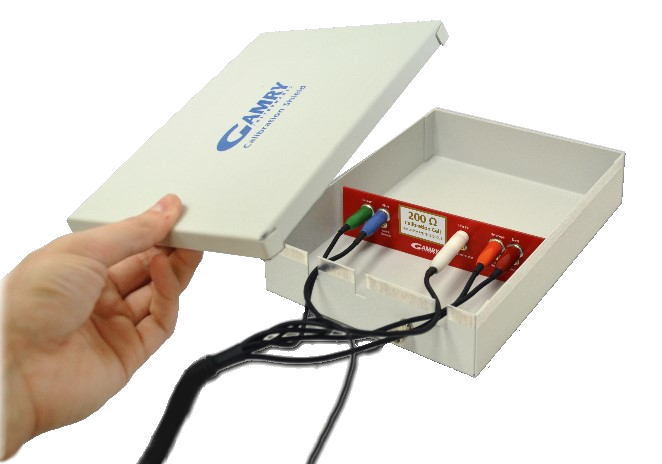
You should calibrate using the cell cable used in testing. It is connected to a resistive “dummy” cell which is placed within a Faraday cage. A suitable dummy cell ships with every Gamry potentiostat. Always calibrate using the dummy cell supplied with your instrument or a replacement dummy cell of the same type. Contact your local Gamry sales representative or e-mail Gamry's technical support if you do not have your dummy cell.
|
Gamry’s dummy cells are carefully designed for optimum DC and AC performance. We strongly advise against the use of a different dummy cell or resistor in calibration. AC Calibration is particularly sensitive to poor dummy cell choices. |
|
AC Calibration constants depend upon particular cables. An instrument that is used with both a 60 cm cable and a 150 cm cable will have two separate AC calibration tables. When you run an experiment, the potentiostat determines the type of cable connected and the appropriate corrections are applied. For this reason, you should recalibrate whenever a new type of cable is connected. |
Calibration process
1.Before starting an instrument calibration, connect the Chassis Ground on the back of your potentiostat to a known, good earth ground.

Rear panel of the Interface 5000 potentiostat with the Chassis Ground connector highlighted.
2.Connect the cell cable to the correct color-coded receptacles on the Calibration Cell. Place the Calibration Cell inside the Calibration Shield, close the lid, and connect the black floating ground lead of your cell cable to the Shield’s grounding post.
|
Depending on the instrument, the Calibration Cell may vary. Refer to the potentiostat's Operator's Manual for more information on the correct Calibration Cell. |
3.Open Gamry Framework™ software. User calibration may be initiated through two different ways:
•Run the instrument calibration by selecting Experiment > Utilities > Calibrate Instrument on the Framework menu bar.
•Alternatively, go to Options > Instrument Manager... on the Framework menu bar.
Click the Calibrate in Framework button, located in the Calibration area of GIM. This launches the appropriate calibration routine for the instrument selected in GIM.
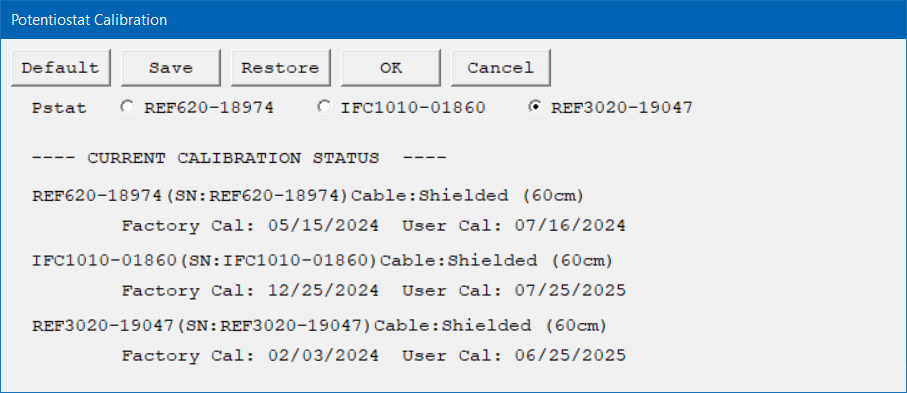
4.The calibration dialog box opens.
The calibration history of any connected instrument is listed in the lower half of the window.
Parameter |
Description |
Units |
|---|---|---|
Select the potentiostat/galvanostat to perform the experiment. Each radio button corresponds to an installed potentiostat. You can select only one potentiostat at a time. Potentiostats that are already in use are marked with an asterisk. They can be selected but cannot be used. |
|
5.Select the potentiostat for the calibration and click the OK button.
The Performance Tips window appears.
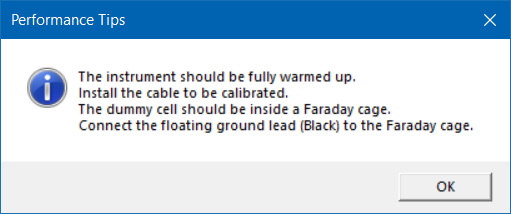
6.Make sure that all of the tips are true, then click the OK button.
The Cell Required window appears.
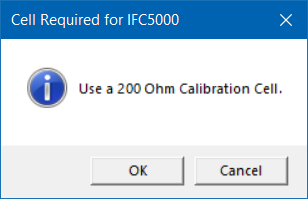
7.Make sure that the correct Calibration Cell is attached, then click the OK button.
The calibration runs.
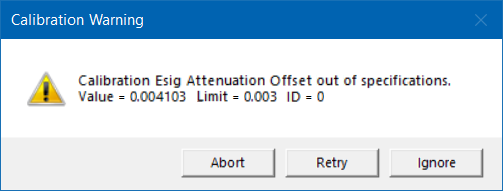
8.If any calibration values are out of specifications, a warning message appears.
You can Abort the calibration procedure, Retry the calibration process after checking and adjusting your setup, or Ignore the error if this part of the calibration is not of interest for your application.
9.The Done window appears. Click the OK button to confirm completion.
|
A calibration backup file with the file extension *.CalData is generated and stored in the CalBackup directory. The file name contains the instrument model, its five-digit serial number, the current firmware version and a time stamp, e.g., IFC1010-01860_FW4.91_20250804_105350.CalData. The default path is C:\ProgramData\Gamry Instruments\Framework\CalBackup\.
In addition, a summary file (*.txt) of the calibration results is stored in the My Gamry Data directory, e.g., Calibration Results PC6-01860.txt. Use this file when contacting Gamry’s technical support in the case of any calibration problems. |