Description
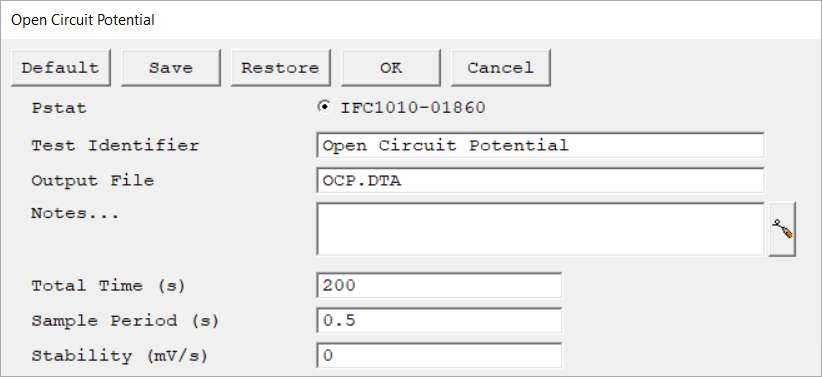
Modify parameters and settings that the technique uses to run an experiment. The contents of the setup window depend on the selected experiment. The window includes text fields to enter data values and add descriptions, as well as radio buttons, check boxes drop-down lists to enable or disable and select specific settings. Press OK to confirm your selection and continue.
When you set up one of the standard experiments, five buttons at the top of the setup dialog box. These buttons are universal for all techniques and control the setup box itself as well as the saving and recalling of parameter sets from your computer's hard drive.
Reset all parameters on the screen to their default values. This is useful for correcting typing errors or retrieving previous values for a parameter you already modified.
The default values are those specified by the Explain script. All standard scripts automatically restore the last used values, which are the ones initially displayed to the user. To revert to the original script-specified values, use the Default button. |
|||
Save the current parameter set to your computer. This is useful when you are running repetitive tests. Parameter sets are stored within a setup file with a *.SET file extension. Multiple parameter sets can be stored in each file, distinguished by a Set Name.
When you select Save, a dialog box opens. Choose the setup file where you want to save the parameter set and enter the Set Name within the file. Press Save to confirm and store the set in the specified file.
|
|||
Retrieve a parameter set from your setup file. This is useful for running repetitive tests.
Selecting Restore opens a dialog box. Select the setup file (*.SET) where your parameter set is saved and the Set Name within the file. Press Restore to confirm your selection.
|
|||
Accept the parameters currently displayed in the setup dialog box. The setup window closes and Framework proceeds with the next phase of the script. This may be running the experiment or opening a second setup dialog window.
Framework remembers the parameters so they do not have to be re-entered next time.
|
|||
Cancel and close the setup menu without saving any entered parameters. |
|||
Select the instrument and enter the setup parameters for the experiment. |
Most numbers entered use the floating-point format. We recommend that you only enter a decimal point when actually required. For example, type 1 not 1.0. If you need to enter very large or very small values, use E-format, for example, 1.23E-4 to represent 0.0001234. Note that “E” (upper and lower case) is the only valid letter in this format. Unless specified otherwise, all values in the standard techniques should be in SI units.
On/off switches in the setup are indicated by square check boxes. To change a switch's state with the mouse, click the box to activate or deactivate it. From the keyboard, tab to the switch until it is highlighted with a dotted line, then press the space bar to change its state. The label next to a switch always shows its current state, not the state after switching.
