Description
The purpose of a loop step is to re-run a single step or multiple steps until the loop criterion is met.
File names are managed automatically by the loop steps, as described in Data File Names. Loops are also valuable when Using Variables.
There are six distinct kinds of loops in the Sequence Wizard with two being instrument-specific.
Loop (Cycle)
The Loop (Cycle) step allows you to re-run a single or multiple steps for a user-specified number of cycles. This step can contain any number of other steps, including other loops. To properly use Loop (Cycle),
1.First select a Loop (Cycle) step from the Available Steps under Sequencer Utilities, and add it to the User Defined Sequence.
2.Then add any steps you wish to loop as children of the Loop (Cycle) step. You can do this in two different ways:
a.You can select the Loop (Cycle) step in the User-defined Sequence and then add the children from the Available Steps,
b.or you can add all of the steps and then order your sequence afterwards.
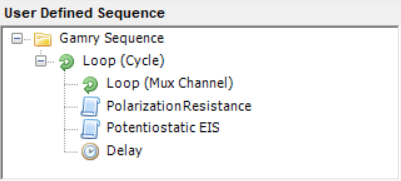
Either way, you end up with the same result. A simple example of how to use a loop is shown in the following sequence:
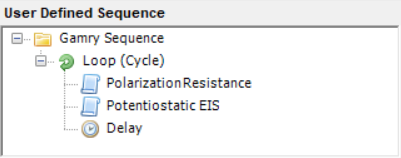
In this sequence there are three steps listed as children of the Loop (Cycle) step. These child steps (Polarization Resistance, Potentiostatic EIS, and Delay) run within the loop. By double-clicking the Loop (Cycle) step you can edit the number of cycles the loop will run. The parameter dialog box for the Loop (Cycle) step is pictured below:
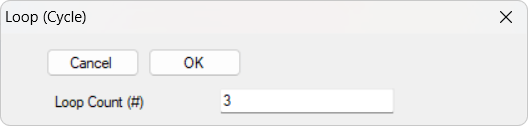
The default Loop Count is 1. You can change this and then click the OK button to save your change.
When the sequence pictured above is run, it first performs a Polarization Resistance measurement, followed by a Potentiostatic EIS scan. Then the sequence pauses for the user-specified time in the Delay step. Then the sequence repeats again three times, until it has performed all three sub-steps for the number of cycles specified by the Loop Count parameter.
Loop (Time)
The Loop (Time) step is similar to the Loop (Cycle) step except it allows you to repeat a single step, or multiple steps, for a user-specified amount of time. The parameter dialog box for the Loop (Time) step is:
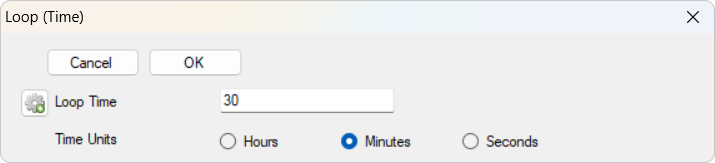
The default Loop Time is 30 minutes. You can change the Loop Time and Time Units and then click the OK button to save your changes. The child experiments run until the time has expired.
|
Note that when using a loop, ALL associated child experiments will be executed in full, as the timing is only checked at the loop’s. Consequently, if the loop’s duration has not yet expired, an additional complete loop cycle will be started. |

Loop (Variable)
The Loop (Variable) step allows you to loop child steps until a variable meets a certain criterion.
|
Before using this loop, please read the section Using Variables. |
A simple example of using this Loop step is:
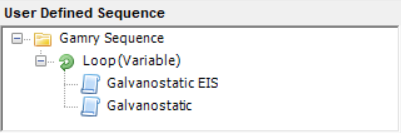
Let's assume we have a battery connected to our potentiostat. In the sequence pictured above , we are going to Loop until variable VLAST has exceeded some value. Inside the loop we perform a Galvanostatic EIS scan followed by a Galvanostatic charging step. The parameter dialog box for the Loop (Variable) step is:
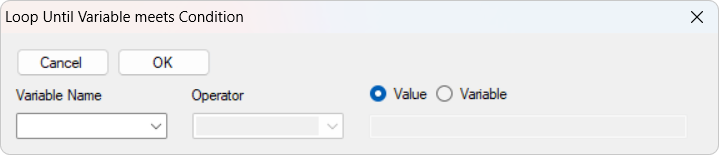
This dialog box lets you select a Variable Name. The drop-down list contains all reserved and pre-defined variables. Additionally, you can add your own custom variables using the Sequence Wizard step Define Variable. After you select a variable, different Operators become available. These Operators are conditional operators:
< |
less than |
Loop finishes when the variable is less than the value entered. |
<= |
less than or equal to |
Loop finishes when the variable is less than or equal to the value entered. |
> |
greater than |
Loop finishes when the variable is greater than the value entered. |
>= |
greater than or equal to |
Loop finishes when the variable is greater than or equal to the value entered. |
= |
equal to |
Loop finishes when the variable is equal to the value entered. |
!= |
not equal |
Loop finishes when the variable is not equal to the value entered. |
The Value is the value against which the variable is compared, whereas Variable uses another variable to compare with.
|
The entered value needs to be an appropriate numeric type for the selected variable. For example, an integer cannot be compared to a real number but rather must be compared to an integer. |
Pictured below are the entries used for the above example:
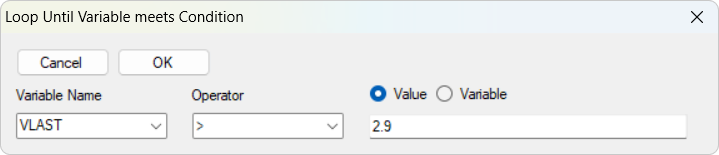
After all these fields are defined and you click the OK button, that step in the Sequence shows the Variable Name, Operator, and Value. When running the sequence, the loop continues until the measured voltage value exceeds 2.9 V.
Loop (Cyclic Charge Discharge)
The Loop (Cyclic Charge Discharge) step is specific to Electrochemical Energy experiments when charging/discharging a battery. The parameter dialog box for the Loop (Cyclic Charge Discharge) step is:
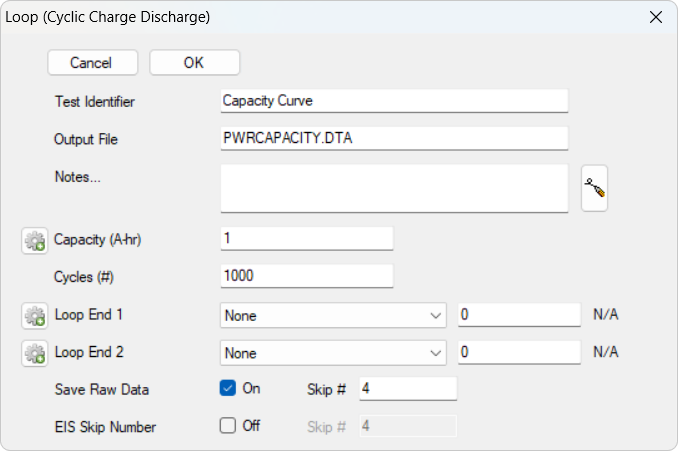
The setup is more complex than the previous Loop steps shown and looks more like a standard experiment setup window. It allows setting up to three loop-end criteria for the charge/discharge experiment. Cycles (#) depicts the maximum number of charge/discharge steps being performed. Loop End 1 and Loop End 2 are two optional stop-criteria. Following criteria can be set using the drop-down list:
None (default) |
No additional stop-criteria set. The loop ends after the set number of cycles. |
Discharge Time < Limit |
The Loop step ends if the Discharge Time is below a set threshold. The value field on the right changes to seconds. |
Charge Time > Limit |
The Loop step ends if the Charge Time exceeds a set threshold. The value field on the right changes to seconds. |
Capacity < Limit |
The Loop step ends if the measured Capacity is below a set threshold. The value field on the right changes to ampere-hours (Ah). |
|
The entered parameter must have an appropriate numeric type. For example, an integer cannot be compared to a real number but rather must be compared to an integer. |
A simple example using this Loop step is:
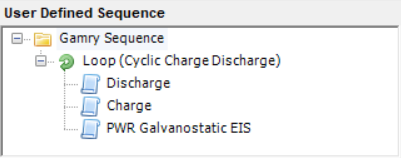
Here, a battery is first discharged and then charged to a specific voltage. After a voltage finish step, a Galvanostatic EIS experiment is run. The loop continues until one of the set criteria is met.
A special case when using the Loop (Cyclic Charge Discharge) step is the Output File field. This file is the main output file for the charge/discharge experiment containing the measured data for each cycle. The Raw Data files are stored in a sub-folder and contain the current and voltage data versus time for each cycle. Their file name is set within the Discharge and Charge steps.
Loop (Mux Channel)
The Loop (Mux Channel) step sets the channels of your Multiplexer that are set to active after each loop. The parameter dialog box for the Loop (Mux Channel) step is:
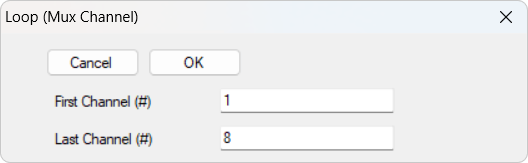
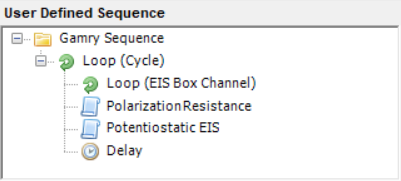
The Loop step cycles then from the First Channel (#) to the Last Channel (#). Note that you can also combine this Loop step by nesting it into a Loop (Cycle) step to run multiple channel cycles on your Multiplexer. A simple example is shown below:
Loop (EIS Box Channel)
The Loop (EIS Box Channel) step sets the channels of your EIS Box that are set to active after each loop. The parameter dialog box for the Loop (EIS Box Channel) step is:
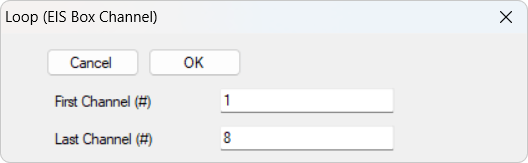
The Loop step cycles then from the First Channel (#) to the Last Channel (#). Note that you can also combine this Loop step by nesting it into a Loop (Cycle) step to run multiple channel cycles on your EIS Box. A simple example is shown below: