Description
Variables are a powerful aspect of the Sequence Wizard. They allow you to make dynamic changes to your sequence, based not only on values you enter, but on values that are measured. They can be linked to specific parameters, modified, and integrated into loops.
Variables are named objects that you can use in place of normal setup parameters. There are three types of variables:
•Potential
•Real
•Integer
You can only use variables where the type of the variable is the same as the type of the setup parameter. For example, a Time is usually entered as a real number, so a variable that will be used for a time would be of type Real. Cycle numbers are usually Integers. Voltages are usually Potentials.
Setup parameters that can be linked with a variable have a gear symbol next to their name. Once linked, the symbol changes and the parameter's input value is set to the linked variable.


Pre-defined Variables
Variables always have a name. Names are alphanumeric, but must start with a letter from A–Z. There are six reserved names:
Last measured potential in volts. |
|
Last measured potential versus a reference potential in volts. |
|
Last measured current in amperes. |
|
Last measured charge value in coulombs. |
|
Last measured modulus (magnitude) of the AC impedance in ohms. |
At the start of a sequence, these variables default to a value of zero. They stay at zero until a step which measures voltage (for VLAST or VLASTvsREF), current (for ILAST), charge (for QLAST), resistance (for RuLAST), or impedance (for ZmodLAST), is run.
VLAST is a variable which may be commonly used. For example, you may wish to galvanostatically charge a battery for a specified amount of time. Next you may wish to potentiostatically hold the battery at the last measured voltage and measure the amount of charge that is flowing. This is an instance where VLAST would be used.
The Sequence would look like:
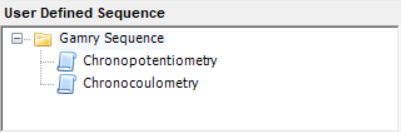
|
Notice that there is no mention of a variable in this sequence tree. That is because VLAST is always defined. |

So, let's see how to use VLAST. Open the Chronocoulometry setup:
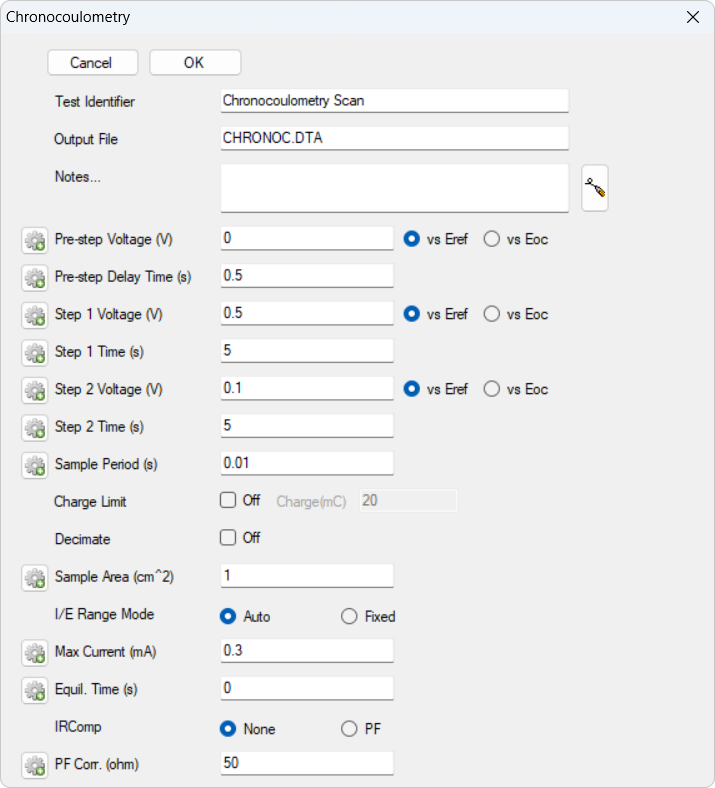
There are three different voltages in this step: Pre-step Voltage, Step 1 Voltage, and Step 2 Voltage. For our simple example, we want to make all of them the same and equal to VLAST.
Click on the Variable Information Icon next to the Pre-step Voltage parameter. A menu that looks like the following appears:

Select VLAST from the menu. The parameter dialog box is now:

Notice that the Pre-step Voltage field is now grayed out, and that the Variable Information Icon has changed. A Variable Information Icon with yellow indicates that a variable is being used. If you click on the Variable Information icon now, you should see that VLAST is selected.
Repeat this process for the Step 1 Voltage and the Step 2 Voltage. The parameter dialog box is:
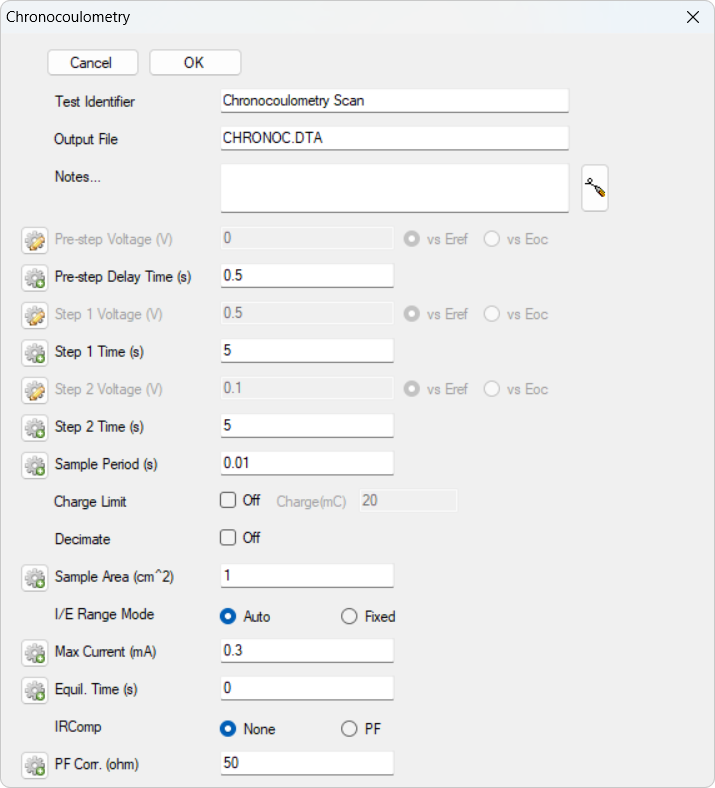
The sequence setup is complete. The Chronocoulometry step uses the last measured voltage from the previous step, Chronopotentiometry.
User-defined Variables
Besides pre-defined variables, the Sequence Wizard allows you to create your own user-defined variables. Assume you want to perform a constant-voltage experiment (potentiostatic hold) at 12 different, but evenly spaced, voltages. You could create a sequence with 12 different potentiostatic steps, or you could simply use four steps, a Define Variable step, a Loop (Cycle) step, a Potentiostatic step, and a Modify Variable step.
Here is what these two sequences might look like. First, the 12-step method:

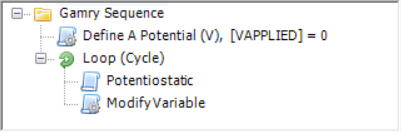
and now the experiment using a variable:
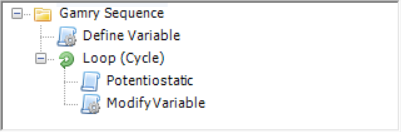
You can see that the variable sequence has less for you to set up and less work to do. Rather than editing each of the twelve steps, entering a different voltage and a different file name for each, you must edit only four steps. This also gives you more flexibility. You can simply change a single variable or its Operator and create a completely new experimental sequence.
Open the parameter dialog box for the Define Variable step. It looks like this:
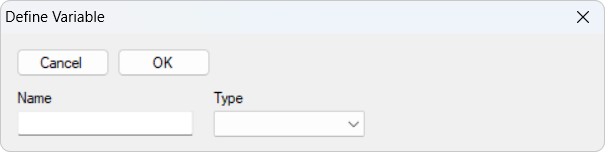
There are two fields to edit:
Name |
The name of the variable. |
Type |
The type of the variable. |
Let's enter our Name, VAPPLIED, and select our Type from the drop-down menu. In this case, our type is a Potential. The parameter dialog box is now:
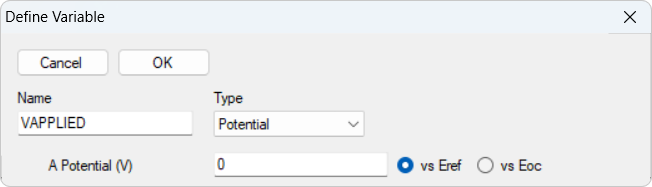
A new set of controls appears below the Name and Type controls. Using these controls is how you specify the initial value of your variable. In our case, we keep the default of 0 V versus Eref. Click the OK button to save your variable.
With a new variable VAPPLIED defined, the sequence updated and shows the newly defined variable.
Let's set our Loop Count parameter. Open the parameter dialog box for the Loop (Cycle) step by double-clicking on the step or right-clicking on it and selecting Properties . Enter a Loop Count of 12. Your parameter dialog box should be:
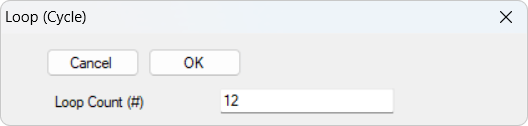
Click the OK button to save the Loop Count.
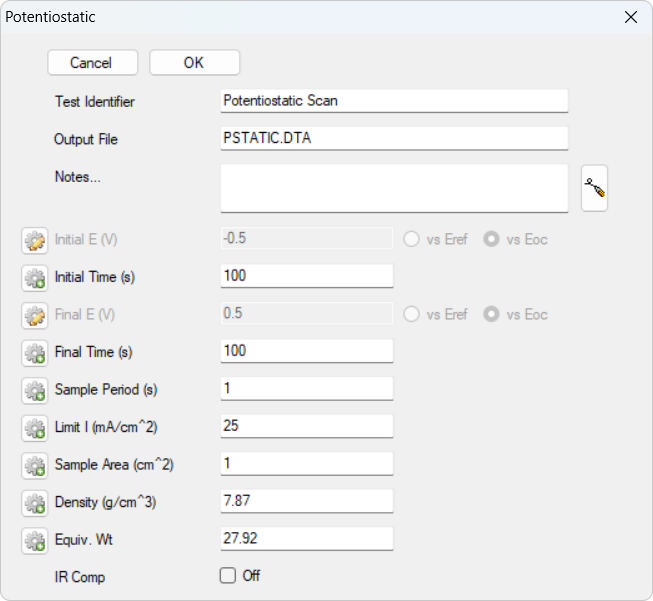
Now we are ready to use our variable. Open the parameter dialog box for the Potentiostatic step by double-clicking on the step:

There are two different potentials in this step, Initial E and Final E. We shall substitute our variable VAPPLIED for these two setup parameters. Click on the Variable Information Icon next to the Initial E setup parameter. A menu appears:

By default, None is selected. But notice that there are two variable names also on the list, VLAST and VAPPLIED. Select VAPPLIED by clicking on it. The parameter dialog box appears again with the Initial E parameter now grayed out and the Variable Information Icon changed.
|
A yellow Variable Information Icon indicates that a variable is being used. If you click on the Variable Information icon now, you should see that VAPPLIED is selected. |
Do the same thing for Final E because we want the same potential applied throughout the step. The dialog box is now:
When you are satisfied with your changes, click the OK button.
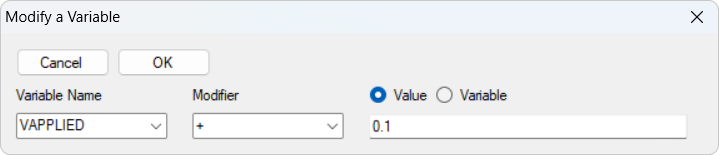
The final edit is to the Modify Variable step. This step is inside our loop. It is run after every Potentiostatic step. Open its parameter dialog box by double-clicking on the step:
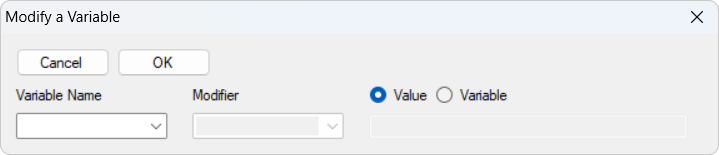
The dialog box starts out empty. You first must select the variable you wish to modify from the Variable Name drop-down list:
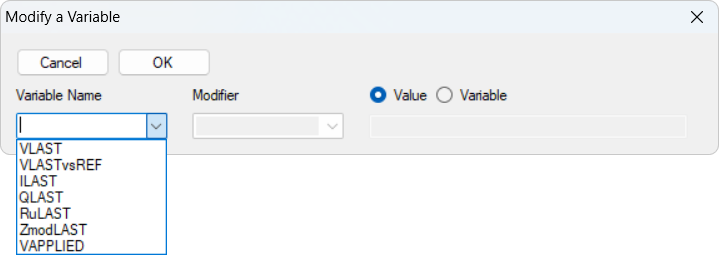
Select VAPPLIED from the list. Notice that the Modifier drop-down list is now enabled. Select from one of five entries:
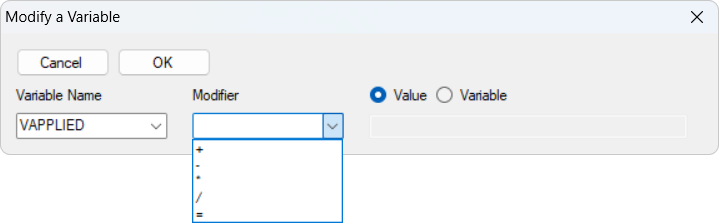
+ |
Addition |
- |
Subtraction |
* |
Multiplication |
/ |
Division |
= |
Assignment |
We want to use addition. Select '+' from the list. The Value field becomes enabled. Enter a Value of 0.1. This increments our VAPPLIED value by 0.1 V each time through the loop. The parameter dialog box is then:
Click the OK button to save changes.
Now we have our sequence defined. Our initial voltage is 0 V versus Eref. After the first Potentiostatic step, we increment VAPPLIED to 0.1 V. After another Potentiostatic step we increment to 0.2 V, and so on, until all twelve steps have been performed, and our final voltage is 1.1 V. The sequence then ends.
Example of QLAST in a Sequence
QLAST is a reserved variable name that stores the last amount of charge measured by the potentiostat, either flowing in or out, during the immediately past Electrochemical Energy experiment. QLAST is a REAL data type and is used only in the Sequence Wizard.
You do not need to define or declare QLAST as a step in your Sequence in order to use it later on in that Sequence.
The next time you run an Electrochemical Energy experiment in that Sequence, QLAST gets overwritten with a new value. Therefore, if you need to use the original value of QLAST, assign another variable to that value of QLAST before it gets overwritten.
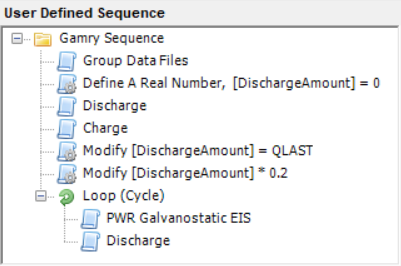
In the above example, a user-defined sequence is shown, incorporating the variable QLAST.
This particular example discharges a battery, then charges it. The value of that charge passed through the potentiostat is stored automatically in QLAST and then assigned to the variable DischargeAmount. Then the Loop is run to discharge the battery in steps whose value is 20% of the total charge.