Description
Creating a sequence is as easy as using the mouse to select your steps. This tutorial will help you to create your first sequence. When you are finished, this sequence will loop a 20-second Open-Circuit Potential experiment three times, with a ten-second pause between runs. Now on to the sequence!
1.Start the Gamry Framework™ by clicking on the Framework icon.
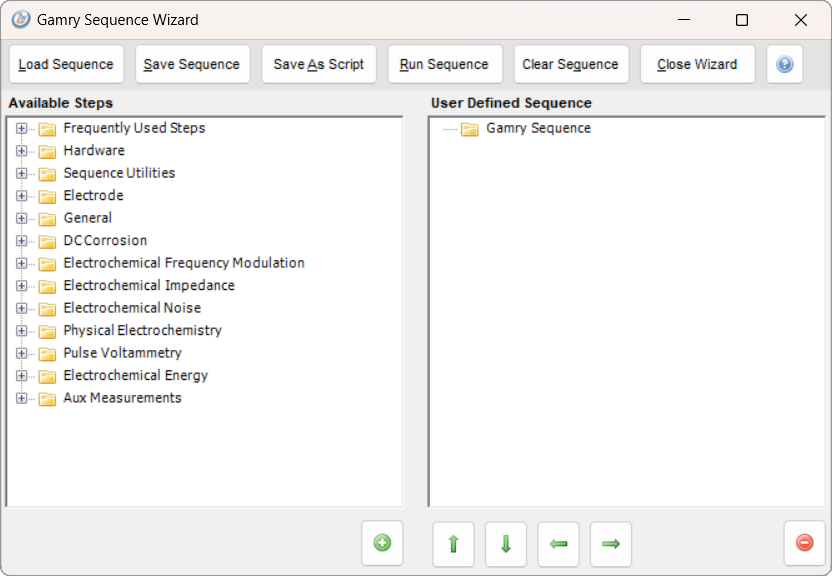
2.Bring up the Sequence Wizard by selecting Sequence Wizard from the Experiment menu or pressing CTRL+W.
3.The Gamry Sequence Wizard window appears:
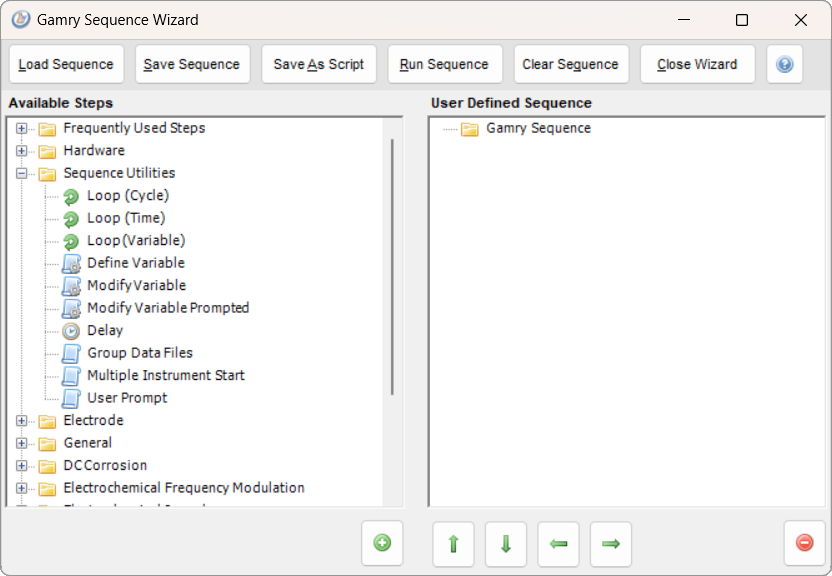
4.Expand the Sequence Utilities category by clicking the plus  sign next to Sequence Utilities. Your window then looks similar to the following:
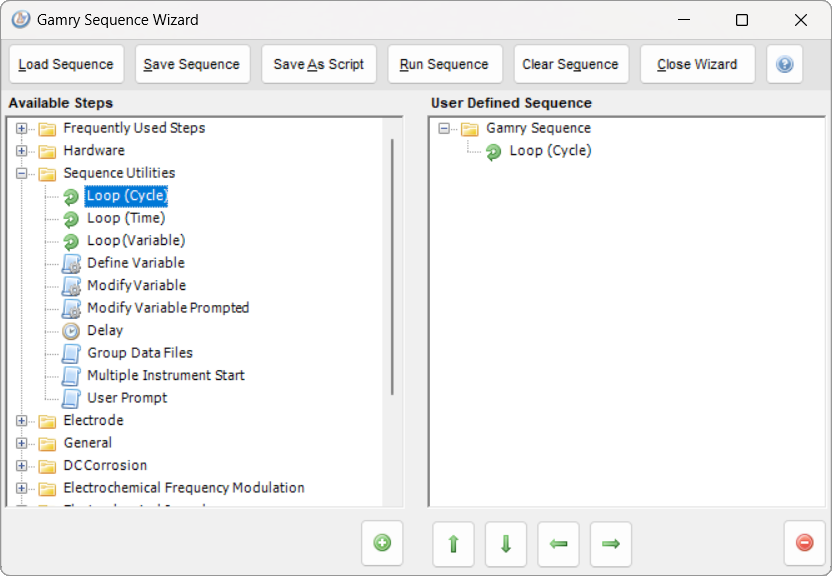
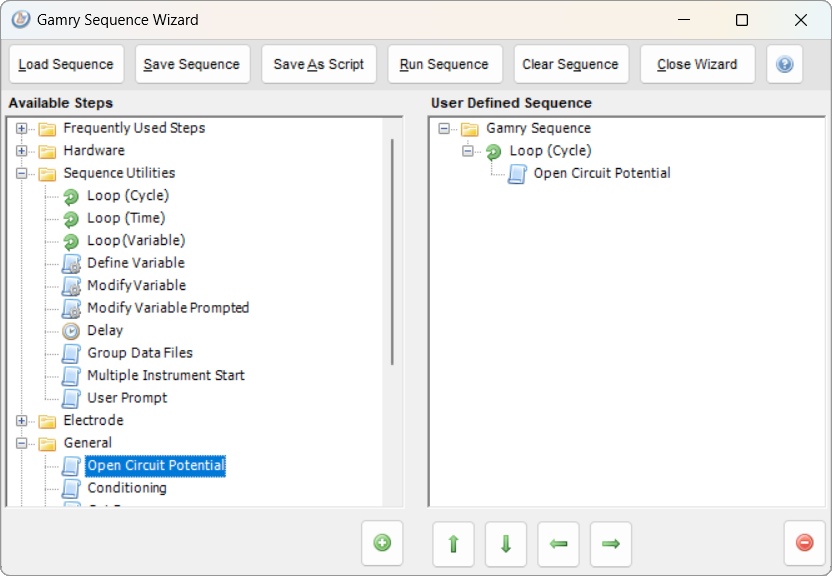
5.Double-click the Loop (Cycle) icon beneath the in the Available Steps tree. It then appears beneath the User Defined Sequence. If you prefer you can single-click the Loop (Cycle) icon and then click the Add Step to Sequence instead. Either way, your window should look similar to the following: window then looks similar to the following:
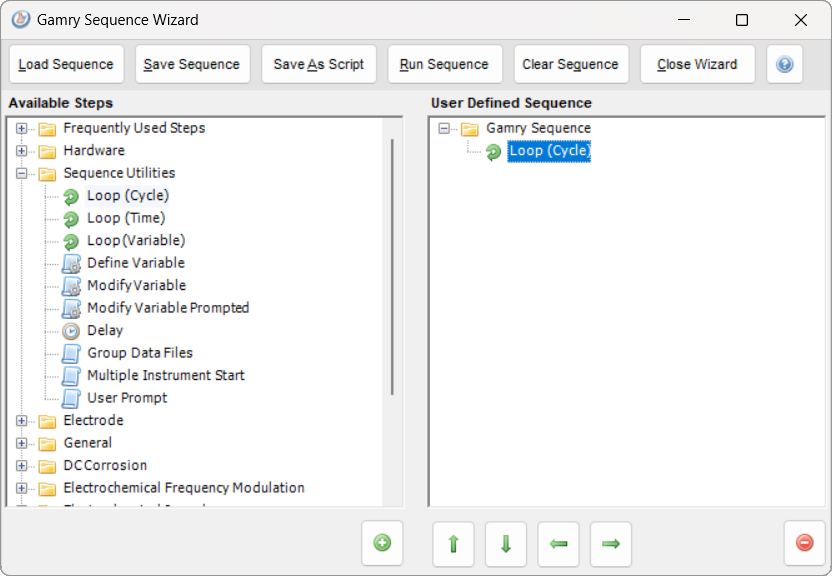
6.We have just added our first step to the User Defined Sequence. But a loop by itself is not really useful, so we should add something underneath it. The current selection in the User Defined Sequence is Gamry Sequence. Click the Loop (Cycle) icon beneath the User Defined Sequence. This makes it the current selection as shown below:
7.Expand the General category under the Available Steps tree and double-click (or single-click followed by clicking the Add To Sequence button) the Open Circuit Potential step. The Open Circuit Potential step becomes a child of the Loop. Children of the loop are the steps that are actually looped. If we skipped Step 6, the Open Circuit Potential step would not have been added as a child of the Loop. Your sequence should now look like:
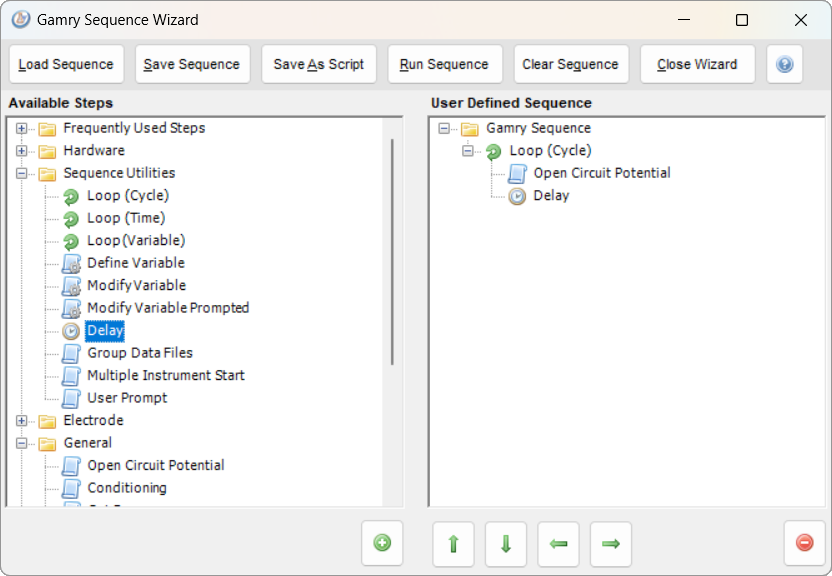
8.Now add one more step to our sequence. Add the Delay step under Sequence Utilities by double-clicking it. It will be placed beneath the Open Circuit Potential step. Your sequence now looks like:
9.This is the basis for our sequence. Let's set some parameters for each of the steps. We set parameters by double-clicking on the step beneath the User Defined Sequence, or by right-clicking on a step and selecting Properties. Let's start by checking the parameters of our Loop. If we double click the Loop icon under the User Defined Sequence, we get a dialog box:
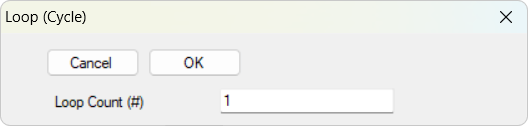
10.Now we can edit the Loop Count. Enter 3 in the Loop Count field. Then click the OK button. If you were to recheck the properties by double-clicking on the Loop step, you would see that it shows we have a Loop Count of 3.
11.Now let's check our Open Circuit Potential parameters by double-clicking on the Open Circuit Potential step in our User Defined Sequence tree. A setup dialog box open:
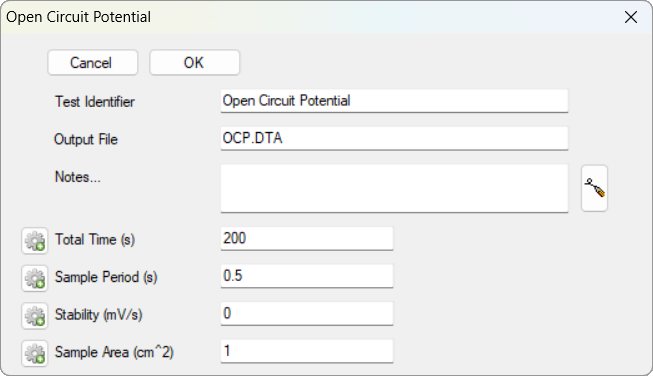
12.Shorten the Total Time from 200 seconds to just 20 seconds. Then click the OK button.
13.Next check your Delay parameters by double-clicking on the Delay step in our User Defined Sequence tree. Your dialog should be similar to this:
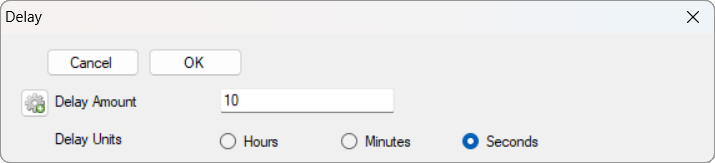
14.Default is a 10-second delay. This is good enough for our needs, so leave it alone and click the OK button.
15.Now, before you do anything else, save the sequence. Click the Save Sequence button. The Save As dialog box appears in which you can select the file path enter a file name such as My First Sequence. Click Save to confirm.
16.Finally, we are ready to run. Click the Run Sequence button to generate and run the sequence. When the script begins, it selects the first available potentiostat and tells you what instrument it selected, using a dialog box like the one shown here:


17.Click the OK button. The sequence begins to run. For this purpose, we assume you have never run this sequence before, so it generates new data files for you, OCP_#1.DTA, OCP_#2.DTA, and OCP_#3.DTA, one for each of the loop cycles. If this sequence has been run before and the data files already exist, you are asked if you wish to overwrite them.
18.When the sequence runs, you will see a window similar to this:
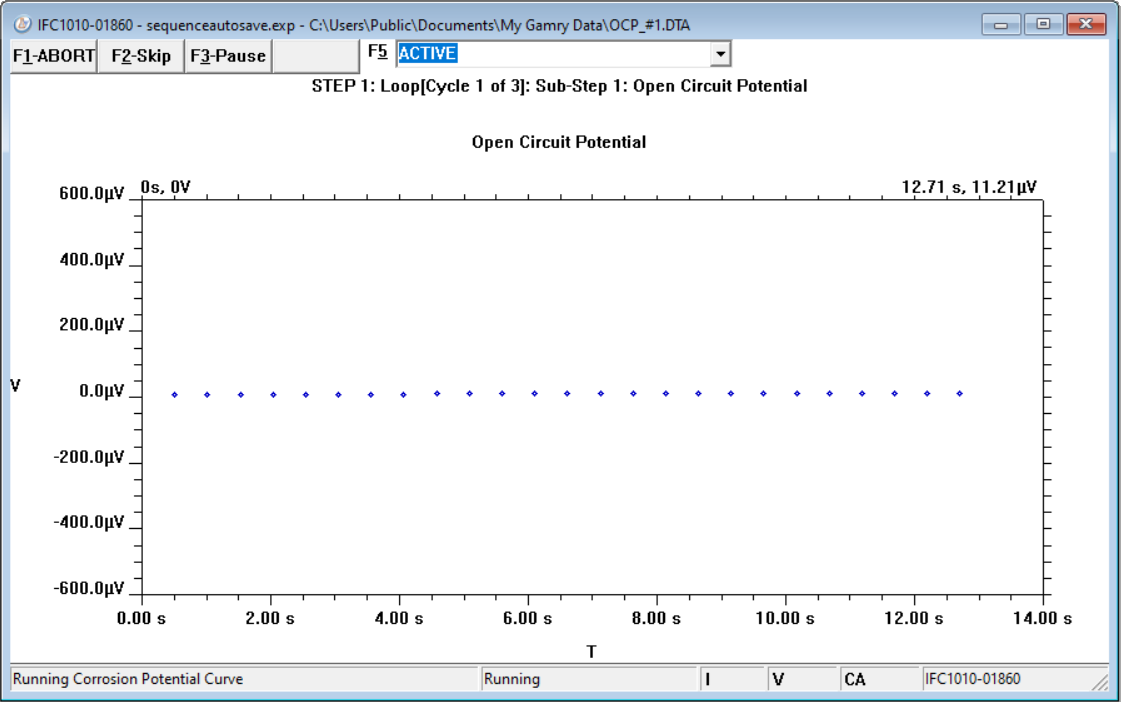
19.In the Headline area at the top is written STEP1: Loop[Cycle 1 of 3]: Sub-Step 1: Open Circuit Potential. This area always shows what step in the sequence is active. Because the first step is a loop, it then shows the current cycle number as well as the sub-step being run. Our test sequence has one step, the Loop, with two sub-steps, Open Circuit Potential and Delay. Our Loop is to run for three cycles.
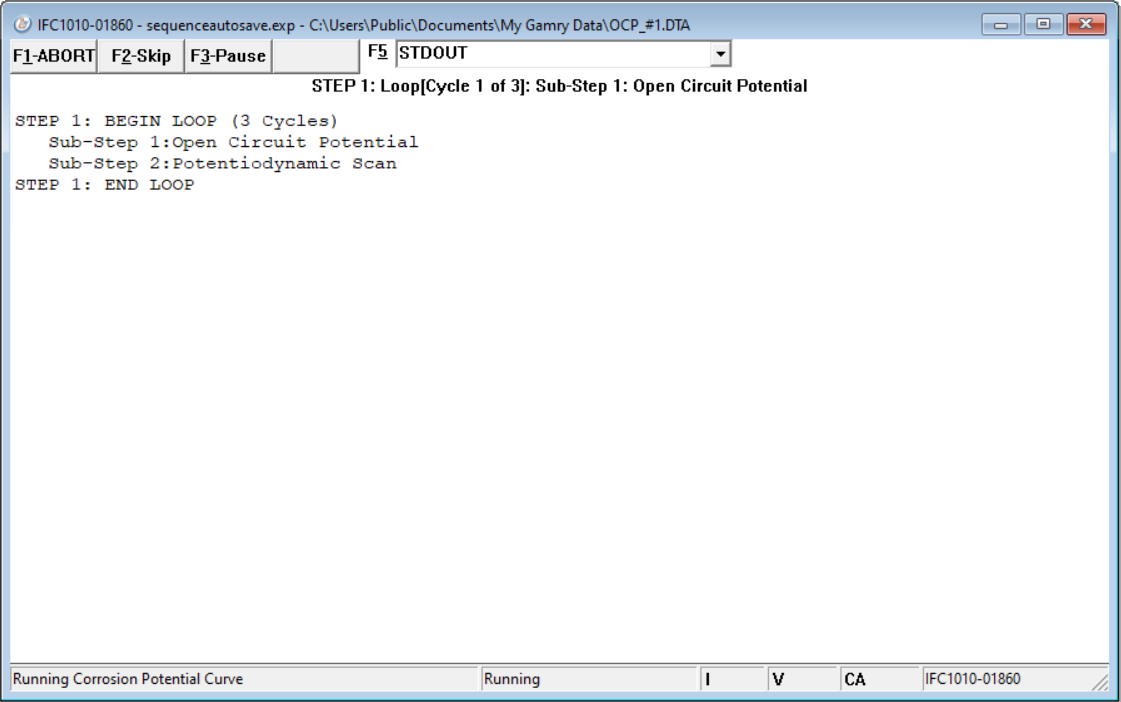
20.Take a quick look at the STDOUT window by selecting STDOUT from the drop-down list in the runner window (or by pressing F5 and then selecting STDOUT).

21.A description of our sequence appears. Notice that the Headline is still visible even though you are looking at the STDOUT window. This makes finding your location within the sequence easy.
22.When the sequence is finished running, the runner window closes automatically. Your first sequence if finished.